https://consumerlawyernetwork.com/blogs/fundamentals.atom consumerlawyernetwork.com - Skill Building: The Fundamentals 2022-09-21T21:12:57-07:00 consumerlawyernetwork.com https://consumerlawyernetwork.com/blogs/fundamentals/tips-for-drawing-from-a-holster-a-beginners-guide 2022-09-21T21:12:57-07:00 2022-09-21T21:16:16-07:00 Tips for Drawing From a Holster — A Beginner's Guide Athena Means More

]]>
Drawing from a holster may seem intimidating, but it's an important competency, especially if you carry concealed. While it's a skill that anyone can learn, practicing the right way will help you get better faster.

Here are a few tips to help you feel more confident when learning to draw from a holster.

Why you should learn how to draw from a holster

If you carry concealed, knowing how to safely and quickly draw from a holster is essential. When faced with a dangerous situation, drawing your firearm safely and quickly can mean the difference between life and death.

You'll also need to know how to draw if you want to compete in shooting sports and other competitions. For example, shooting sports like IDPA or USPSA require that you know how to draw from a holster.

The fundamentals of drawing from a holster

The process of drawing from a holster can be broken down into a few steps:

  • Bring your strong hand down to the gun and get a firm grip on it while the gun is still in the holster. At the same time, move your support hand to your chest.
  • Lift the gun straight up out of the holster and start pointing it toward the target
  • As you are bringing the gun up, place your support hand and place it on the gun
  • Extend your arms in front of you, aim, and fire at your target

We know that's a lot to learn at once, so here's a great video by world champion Julie Golob. Watch this video to see her illustrate the basics of drawing from a holster:

Don't rush the process!

When drawing from a holster, the most important thing to remember is that your safety is more important than anything else. It’s easy to get ahead of yourself when you're just starting out, so resist the urge to go fast right away. Rushing your draw will introduce costly mistakes and potentially dangerous situations.

A good rule of thumb when practicing is to start by getting the motions right without concerning yourself with the amount of time it takes to draw. Once you have a good feel for the motions, you can start timing yourself. Start with a time that allows you not to feel rushed, then you can slowly decrease the time and work on your speed.

Take advantage of dry fire practice

Dry fire practice is an excellent way to hone your drawing skills. It doesn't require you to spend money on ammo. It also doesn't require a lot of space, which means you can practice just about anywhere in your home.

The most important thing to remember when dry firing is safety. Always make sure your gun is unloaded (triple check) and that there is no ammo in the room before beginning any practice session. 

The best way to begin dry firing is to set aside a short amount of time every day to practice. Even 5 minutes a day will help you improve. After making sure your gun is unloaded, start by carrying out the motions of your draw. You can practice the whole draw at once, or break it down into sections to make sure you get it right.

For example, you can practice just placing your hand on your gun and getting a firm grip. You can also can start with both hands on the gun and practice extending your arms to the target and firing.

Make sure your gun fits your holster properly

It's also important to make sure your gun fits well in your holster. It doesn't matter whether it's an inside or outside the waistband holster - if it doesn't fit your gun correctly, it’s going to compromise your draw, which isn't safe.

A proper firearm holster will retain your gun and allow you to draw smoothly without snags or hiccups. To minimize drawing issues, be sure to select a holster that's made for the specific gun you own.

The ability to draw a holster is one of the most important skills for gun owners. The best advice we can give you is to practice drawing until it becomes second nature for you, then practice some more!

]]>
https://consumerlawyernetwork.com/blogs/fundamentals/the-top-fundamentals-of-handgun-shooting 2021-08-19T18:31:03-07:00 2021-08-19T19:13:24-07:00 The Top Fundamentals of Handgun Shooting Athena Means Do you know what shooting fundamentals are and which skills you should be working on right after you purchase a gun? Here's our list of three of handgun fundamentals you should master right away.

More

]]>
Every gun owner's top goal should be to learn and master the fundamentals. By focusing on the fundamentals right away, you can create a baseline set of skills and a solid foundation to work from when you move on to advanced types of shooting.

Which fundamentals do you need to work on first? Here's our list of three handgun fundamentals you should master right away.

What's a Shooting Fundamental?

In the shooting world, you'll hear the term "fundamentals" thrown around a lot, but what does it actually mean? Shooting fundamentals are the basic, practical skills you need to master your shooting. You may also see handgun fundamentals referred to as pistol marksmanship, which is a similar term for the same concept.

Once you have the fundamentals down, it's easer to learn more advanced skills like drawing from concealment or reloading quickly during competitions.

Fundamental 1: Stance

Perfecting your stance is important for creating a solid shooting foundation and for shooting accurately. In a proper stance, your feet will be about shoulder-width apart, your knees will be just slightly bent, and your weight will be over the balls of your feet. When you're pulling the trigger, your arms should be close to straight out, but not locked. Since everyone's body is different, you'll need to adjust your stance to find out what works best for you within those parameters.

Fundamental 2: Grip

A good grip helps you shoot accurately, while a poor one can prevent accuracy even if you are doing everything else right. It will not only allow your gun to perform reliably, it gives you control over your shot and is essential for managing recoil. A good shooting grip will be loose enough that your knuckles aren't turning white (that's called overgripping) but strong enough to place your shots accurately. When you have a good grip on the gun, your sights will return to the about the same place in between shots.

To get the right grip, starting with your strong hand (gun hand), put your hand on the backstrap or beavertail as high as possible without interfering with the slide to avoid slide bite. Next, bring your support hand up to the gun, making sure the top of your hand is all the way up against the trigger guard. Once both hands are on the gun, check to make sure that you are gripping tightly and getting as much purchase as possible on the gun — look for any gaps and close them by making small adjustments to your hand placement or by gripping the gun a little tighter.

Fundamental 3: Trigger Control

Proper trigger control means you are able to fire your gun without disturbing your sight alignment. It may seem like an easy part of shooting, but it takes a lot of practice to master. A poor trigger pull will pull your shot off target, so it's a critical fundamental to learn right after you buy a gun.

Proper trigger control starts with where you put your finger on the trigger — make sure you don't have your finger in the trigger too far or not enough. The middle part of the pad of your finger is usually the sweet spot. When you pull the trigger, make sure you're pulling it straight back toward you and following all the way through to the end of the pull. This will avoid "jerking the trigger", which is when you end up pulling the trigger to one side and causes poor shot placement.

Improving your shooting skills takes time and patience. It won't happen overnight, but if you practice the fundamentals regularly, you will improve your shooting over time.

]]>
https://consumerlawyernetwork.com/blogs/fundamentals/5-things-all-gun-owners-need-to-know 2021-06-16T21:28:30-07:00 2021-08-09T09:31:34-07:00 5 Things All Gun Owners Need to Know Athena Means Education is an integral part of being a responsible gun owner and continuous learning will help you improve everything from your gun handling to your mindset. Start with these 5 things that every gun owner needs to know.

More

]]>

Whether you're a brand new gun owner or you've been shooting for decades, it's important to learn everything you can about firearms. Education is an integral part of being a responsible gun owner and continuous learning will help you improve everything from your gun handling to your mindset.

There's a lot to know about guns and shooting and trying to figure out what you need to know can seem overwhelming at times. If you're wondering where to start, you can take a look at these 5 things that we believe every gun owner needs to know.

Know and Understand the 4 Rules of Gun Safety

There's no such thing as being too safe when it involves firearms, all gun owners need to have the 4 rules of gun safety memorized. These rules apply in every situation - it doesn't matter if you're on the range or in your home. These rules are also the same whether your gun is loaded or unloaded:

Rule #1 – All guns are always loaded! Treat your firearm the same at all times, as if it actually had ammunition in it.

Rule #2 – Never let the muzzle cover anything which you are not willing to destroy. Sometimes, this rule is explained as always keep the gun pointed in a safe direction.

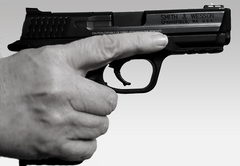
Rule #3 – Keep your finger off the trigger until your sights are on target. Any time you are handling your firearm, but not yet ready to shoot your firearm, your index finger should be along the frame of the gun, not inside the trigger guard.

Rule #4 – Be sure of your target and what is beyond it. If you confront a bad guy in your hallway, make sure that a bedroom is not directly in line behind the bad guy. In a self-defense situation in a public area, you will have to make sure that an innocent bystander does not happen to be behind your target.

Get to Know Your Firearm

Getting to know your firearm inside and out is an important part of gun ownership, especially if you carry concealed. Familiarize yourself with all of your firearm's controls, including the magazine release, slide lock lever, and safety (if you have one).

You also need to know how to break down your firearm, clean it, and reassemble it. To get more familiar with your firearm, spend some quality time with it while unloaded and work all the controls, rack the slide several times, and insert and release an empty magazine several times.

Know Your Local, State, and Federal Gun Laws

Once you become a gun owner, the responsibility of knowing and understanding firearms laws falls on your shoulders. If you are regularly carrying a firearm, it's even more important to know and understand the laws that apply to carrying concealed. Make sure to study and understand all local, state, and federal laws that apply to firearms.

We know that's a lot of laws, so we recommend looking to sources that can help you get accurate information, such as at handgunlaw.us.

Understand How to Effectively Practice and Train 

There's a big difference between casually firing a few rounds at a target and practicing. There's nothing wrong with having some no-pressure fun on the range, but you also need to set aside time to become a competent shooter.

When you're a beginner, it's a good idea to seek out training so you can learn the fundamentals of shooting. Once you have the basics down, make sure to head to the range regularly for structured practice sessions.

When you feel like have a solid foundation, you can use dry fire practice to improve your fundamentals (make sure to follow dry fire safety protocols). Dry fire is using your gun to practice shooting skills and techniques without using live ammunition. With dry fire practice, you can go through all the motions of shooting just like you would at the range, but without firing a shot. 

Know What it Means to Carry Concealed

Making the decision to carry a loaded firearm with you is serious business. You will be out in public with a huge responsibility to yourself and to others around you. Not only that, but being proficient with your firearm is imperative. The last thing you want is to be in a situation where you need to draw your firearm and then realize you don't know to use your gun properly.

One very important thing to remember is that the decision to carry a firearm brings about a whole new set of circumstances and many more factors to consider than simply owning a firearm for home protection.

Before you decide to carry concealed, you need to ask yourself:

Will I have enough time set aside to practice with my carry firearm?
Am I responsible enough to carry a firearm?
Will I stay up to date with my local and federal gun laws?
Do I have the financial means to purchase firearms, ammunition and accessories needed?
Am I prepared to take the life of another human being if presented with a threat?

If you didn't answer "yes" to all of these questions, you probably need to wait to start carrying concealed. Give yourself more time to learn and train before making the leap to carrying a gun.

While this isn't a comprehensive list of what you need to know about firearms, this list will give you a good start. Once you have a solid understanding of these 5 things, you can do more research on your own.

]]>
https://consumerlawyernetwork.com/blogs/fundamentals/what-is-limp-wristing-and-how-can-you-fix-it 2019-09-26T00:03:00-07:00 2021-06-12T19:39:09-07:00 What is "Limp Wristing" and How Can You Fix It? Athena Means Limp Wristing can cause you to be inaccurate and in some cases, it can even cause your gun to malfunction. What exactly is limp wristing and how can you overcome it?

More

]]>
It doesn’t take long in your shooting journey before you hear the term “limp wristing.”  It can cause you to be inaccurate and in some cases can even cause your gun to malfunction.  But what exactly is limp wristing and how can you overcome it?

The Mechanics of a Handgun

Before we get into limp wristing, we need to talk about how a handgun operates.  After we insert the magazine into a semi-automatic handgun, we pull the slide back or rack the slide to load a cartridge into a chamber.  We only have to do that for the first shot.  Once the first round is fired, the slide cycles back from the pressure and then moves forward to load the next cartridge.  This happens repeatedly as long as there are cartridges in the magazine and the gun doesn’t malfunction.  In order for this to happen efficiently, the handgun needs to stay as level as possible.

There just one issue that can make this challenging – recoil!  And that’s where limp wristing comes in.

Limp Wristing – What is it Exactly?

Limp wristing happens when either the shooter does not have a strong enough grip or the wrist does not remain strong and straight or both occur while shooting.  When these things happen, the shooter tends to let the recoil of the gun take over and their hands ride that movement rather than managing the recoil and trying to keep the gun on target as much as possible.  This causes the slide to cycle inefficiently because it’s not being maintained in a level, horizontal position.  Limp wristing only happens with semi-automatic handgun shooters where the slide is responsible for cycling the gun rather than the cylinder of a revolver. 

In order for your semi-automatic handgun to perform efficiently, the slide must complete the cycle.  So, limp wristing can cause malfunctions such as a failure to eject the spent casing completely from the handgun, either remaining in the firearm or partially ejecting, getting caught in the ejection port as the slide comes forward causing a malfunction that is known as a stove pipe.

Another type of malfunction that may occur from limp wristing is a failure to feed, which is when the slide comes back just enough to eject the spent round but does not move forward with enough speed to chamber the subsequent round.  In any of these malfunctions, it is easy for the shooter to believe that something is wrong with the handgun, when in reality the problem may lie in the way they’re shooting. 

How to Fix It

Limp wristing is simple to fix but complex to diagnose because there can be many different causes that come into play. 

Grip – A good grip is essential to reduce limp wristing.  And having a good grip doesn’t only refer to the strength of your grip but the position of both your hands.  First, with your strong hand make sure that you are as high under the beavertail or back of the gun under the slide as you can get.  Get a good grip position with your support hand.  Shooters who “teacup” with their support hand, holding the bottom of the grip rather than on the grip and frame of the gun are more likely to limp wrist.  Hold the firearm firmly with both hands. 

Stance – Your upper body should provide a foundation for your shooting, not your hands and wrists.  Lean forward slightly from the waist to get a more solid foundation for shooting with your arms out in front of you.  Your elbows should not be so flexed that the fly up at a 90-degree angle when the gun recoils.  Think of ideal recoil as the gun moving forward and back on a horizontal plane rather than up and down during recoil.

Alternate Solutions and Special Circumstances

Many times shooters experience some physical difficulties such as arthritis that make it difficult to get a firmer grip on the firearm.  And it’s easy to just to assume that these shooters won’t be able to effectively manage recoil or shoot without limp wristing type malfunction.  In these cases, a change of firearm may help with malfunction issues. 

Polymer frame guns are lighter and easier to carry but also come with more perceived recoil making them more difficult to manage for some.  A heavier gun absorbs more of the recoil energy making recoil management a bit easier.   If grip, arm or upper body strength is an issue because of a disability, consider trying different firearms to see if any will malfunction less. 

Sometimes it IS the Gun

Limp wristing is a term that has also become a popular catch-all term for malfunctions.  While limp wristing may indeed cause handgun malfunctions, shooters shouldn’t automatically believe they are limp wristing despite what someone may tell you.  If you have tried a good grip, started paying attention to your wrists and keeping them stiffer and situated your upper body to provide a firm foundation, and despite all this are still having regular malfunctions, it just might be a problem with the gun.  If you gun malfunctions often, have it checked out by a certified gunsmith to be sure.

Limp wristing is a pretty common issue for newer shooters.  Even experienced shooters can have incidents of limp wristing.   A good firearms instructor can determine if limp wristing is your problem and even show you ways to correct it, and a good gunsmith can make sure your firearm is in good working order and is clean and lubricated.

Once you've determined that you are limp wristing, practice, practice, practice to get your fundamentals down and build up the strength necessary to overcome the issue when you shoot.

]]>
https://consumerlawyernetwork.com/blogs/fundamentals/the-gungoddess-guide-to-controlling-recoil 2019-01-17T22:00:00-08:00 2021-06-12T19:39:12-07:00 The consumerlawyernetwork Guide to Controlling Recoil Athena Means More

]]>
If your gun feels like it's going to jump out of your hand after every shot or you have trouble placing your followup shots in the same spot, there's a good chance you're dealing with a recoil control issue.

Here's the good news - making just a few simple changes can improve your recoil control in a hurry. While you can't completely eliminate recoil, there are some simple things you can do to manage both vertical and horizontal recoil.

Get a grip!

recoil control high gripGetting the right grip with both hands is essential for managing recoil. Starting with your strong (gun hand), get your hand on the backstrap or beavertail as high as possible without interfering with the slide (no one likes slide bite). Next, bring your support hand up to the gun, making sure the top of your hand is all the way up against the trigger guard. Once both hands are on the gun, check to make sure that you are gripping tightly and getting as much purchase as possible on the gun - look for any gaps and close them by making small adjustments to your hand placement or by gripping the gun a little tighter.

If you're drawing from a holster, make sure you establish that same high grip as soon as you bring your hand down on the gun and while it's still in the holster. Place your trigger finger along the side of your holster to make sure you don't have to make any adjustments when you get further into your draw and presentation.

Resist the urge to overgrip

Recoil issues can also be caused by gripping your gun too tightly. When you overgrip with one or both hands, you're going to end up shaking from the tension, making it almost impossible to align your sights. Over-gripping your gun can also cause trigger freeze - that's when you're trying to pull the trigger rapidly and your finger locks up for a split second.

There's a sweet spot between gripping your gun too hard and not gripping hard enough, so you'll need to head to the range and fire some test shots while making small adjustments. Shoot a few groups using different amounts of pressure - when your groups get tighter, you'll know you've found your sweet spot.

Keep your elbows slightly bent

When you present your gun to the target (the press out), check to make sure you aren't locking your elbows. Your elbows should be just slightly bent, which will help better distribute the recoil. It will also help save your joints - our bodies absorb recoil and when you lock your elbows, you're putting a lot of extra stress on those joints!

You can't completely get rid of recoil, but these simple adjustments can make a huge difference. Once you've made these adjustments, you'll be able to get back on your sights faster and place your followup shots much more accurately!

]]>
https://consumerlawyernetwork.com/blogs/fundamentals/the-gungoddess-guide-to-finding-your-dominant-eye 2018-11-21T14:55:00-08:00 2021-06-12T19:39:15-07:00 The consumerlawyernetwork Guide to Finding Your Dominant Eye Athena Means When you first learn to shoot, you may have some trouble getting your sights lined up correctly. It may not be inexperience - it might be your eye dominance.

More

]]>
When you first learn to shoot, you may have some trouble getting your sights lined up correctly. While you may be chalking that up to inexperience, there may be another reason you're missing your target - your eye dominance.

If you haven't figured out which one of your eyes is dominant, take a minute to figure it out now. Read on to find out how to figure which one of your eyes is dominant and learn what to do if you determine you are cross-dominant. 

Why is Eye Dominance Important?

Just like you have a "strong" hand and "support" hand, you have a dominant and non-dominant eye. The dominant eye is the one that focuses on the sights, and if you can't see the sights correctly, your accuracy will be severely affected. 

How to Determine Your Dominant Eye

There are a few simple things you can do to figure out which eye is dominant. The first thing you can do is make a triangle with your hands, then stretch your arms all the way out in front of you. Look through the triangle and focus on an object about 10-15 feet away. Keep your focus on the object while you pull both your hands back toward your face. When your hands reach your face, you'll see that they will naturally go to your dominant eye. 

Another similar test is to make that same triangle, then look through it and focus on an object about 20 feet away. Close one eye, then the other. Your dominant eye will show the object in its normal place, while it will either disappear completely or appear off center using your non-dominant eye.

What to Do if You're Cross-Dominant

Some people are cross-dominant, which means they are right-handed, but left-eye dominant, or the other way around. If you've done the tests above and figured out that you are cross-dominant, don't worry! Aiming a firearm may initially be a little more challenging for you, but there are some things you can do to make the adjustment.

You're going to need to retrain your eyes, and while that may seem complicated, the solution is quite simple. You will need to cover your dominant eye to give your brain the signal that it needs to use your dominant eye to focus. 

Since you don't want to completely obstruct your eye while you're on the range (it's important to see what's going on around you at all times), you can place something on your glasses to force your non-dominant eye to become dominant. Our Shooter's Magic Dots are made just for this purpose - they subtly prevent the eye from focusing, while maintaining depth perception and peripheral vision.

Practice and training is the best way to overcome cross-dominance. If you're still struggling after covering your dominant eye, you may want to consider shooting with your non-dominant hand and see if that brings your aim back on target.

If you have more questions about eye dominance, feel free to get in touch with us so we can help!

]]>
https://consumerlawyernetwork.com/blogs/fundamentals/the-four-rules-of-gun-safety 2018-05-18T13:07:00-07:00 2021-06-12T19:39:17-07:00 The Four Rules of Gun Safety Athena Means Safety is a full-time endeavor when it comes to firearms, and the four rules of gun safety need to be followed every time you handle a firearm. Following these rules will ensure that there will be no accidents.

More

]]>
Many different organizations use a variation of gun safety rules though they are all pretty similar.  Some time ago, a firearms expert by the name of Jeff Cooper codified a set of four gun safety rules that are easy to remember and if followed, will result in no accidental shootings.

These four rules are used most often in classes, by instructors, and at gun ranges.  Some of the terminologies may confuse beginning shooters. So let’s break it down.

Rule #1 – All guns are always loaded! 

gun safety rule 1 all guns loaded all the timeTaken literally, a beginner may feel like it is impossible to unload a firearm.  The rule actually means to treat the firearm the same at all times, as if it actually had ammunition in it.  Sure, you may have checked it to ensure that it is unloaded.  Someone else may have checked it.  But do not let that cause you to treat the firearm with any less respect that you would if you knew it had a bullet in it.  Far too many accidental discharges and shootings began because the handler believed the firearm to be unloaded when it was not.  In summary, act as if the firearm is loaded at all times:  At home, at the range, when you are transporting it to your car or when you pick it up to place it in your gun bag. 

Bottom line:  Always treat the firearm like it is a loaded firearm.

Rule #2 – Never let the muzzle cover anything which you are not willing to destroy.

gun safety rule 2 do not cover with muzzleThe muzzle of the firearm is the place where the bullet exits on its way to a target.  Cover means, essentially, point the gun at someone or something.  So, do not point the gun at anyone or anything that you would not want destroyed.  Sometimes, this rule is explained as always keep the gun pointed in a safe direction.  However, determining safe direction is someplace like a house or a hotel room is not always an easy decision. 

Bottom line: Never point a firearm at anyone or anything that you do not want to shoot.

Rule #3 – Keep your finger off the trigger until your sights are on target.

gun safety rule 3 finger off triggerAny time you are handling your firearm, but not yet ready to shoot your firearm, your index finger should be along the frame of the gun, not inside the trigger guard.  If you place your finger on the trigger, you risk the chance that you will fire a shot when you did not intend to do so.  Keeping your finger indexed along the frame of the gun is a skill that has to be learned and practiced.  It does not come naturally.

Bottom line: The only time your index finger should be on the trigger is when you are ready to fire the shot.

Rule #4 – Be sure of your target and what is beyond it.

gun safety rule 4 know what is beyond your targetThis rule is two-fold.  First, target identification or being sure of your target is critical.  Don’t assume that bump in the night is caused by a bad guy before you are actually sure that is the case.  But not only is it important to identify your target before deciding to shoot, you should know what lies behind your target.  If you confront a bad guy in your hallway, make sure that your child’s bedroom is not directly in line behind the bad guy.  In a self-defense situation is a public area, you have to make sure that an innocent bystander does not happen to be behind your target.

Bottom line:  Make sure of your target and what might be behind your target before you fire the shot.

It’s a good idea to memorize these four safety rules and even recite them to yourself before you begin to shoot every time you go to a range.  They should be second nature and become the way you handle a firearm each and every time.  Following these rules will ensure that there will be no accidents when you handle your firearms whether you are at the range shooting, at home cleaning and maintaining your gun or even holstering your concealed carry firearm.

Never forget that safety is a full-time endeavor when it comes to firearms.

]]>
https://consumerlawyernetwork.com/blogs/fundamentals/trigger-discipline-keep-your-finger-off-the-trigger 2018-05-02T10:42:00-07:00 2021-06-12T19:39:19-07:00 Trigger Discipline: Keep Your Finger Off the Trigger! Athena Means While it may sound easy to do, “finger discipline” may be one of the more difficult safety rules to make a habit. Read these tips on how you can make sure your finger is always where it's supposed to be.

More

]]>
If you have been to any kind of formal firearm training, you have likely heard of this rule. One version says to keep your finger off the trigger until you are ready to shoot, while another version says keep your finger off the trigger until your sights are on target. There are also other, less professional, versions as well. But no matter how you look at it. It is important to keep your finger off the trigger until you are ready to actually fire the shot.

Sympathetic Grip

While it sounds easy to do, “finger discipline” may be one of the more difficult safety rules to make a habit. Your fingers and thumb are meant to work together to grasp something. When your other three fingers grasp the grip of your firearm, your trigger finger wants to grasp something too. You might hear this referred to as sympathetic grip or sympathetic muscle reaction. The only place there is room to grasp is inside the trigger guard. So you have to learn not to grasp with that finger, but rather, to leave it extended. When learning this skill, you will have to pay close attention at first. After much practice, it will become more natural. In fact, you will notice that you begin to extend that index finger all the time, such as when you use a bottle of spray cleaner!

Where Does That Finger Go?

If you are not ready to pull the trigger yet or your sights are not on target, extend your index finger on the slide or frame of the gun.  It is best to get your finger up as high you can and as far away from the trigger guard as possible. You have probably seen some shooter rest that index on the front of the trigger guard. This is not a great idea because if you are moving and trip, or if you get startled such as in a personal defense situation, it is all too easy for that index finger to slip off the trigger guard and onto the trigger. Also, if you are in a firearms course on the range with multiple people, your instructor will likely be observing from your left. If your finger is high on the slide, the instructor immediately can tell that your finger is not on the trigger when it shouldn’t be.

Why is it Important to Keep that Finger Off the Trigger?

The main reason is to avoid the possibility of a negligent discharge. If you learn and make a habit of keeping your trigger finger off the trigger until you are ready to shoot, you are less likely to mistakenly put your finger on the trigger too soon in a personal defense situation. If you are in that situation and feeling the effects of adrenaline, it is so easy for your index trigger to pull back on the trigger before you are actually ready to make the shot.

Before AND After

Often, shooters who are learning will fire a shot and then leave their finger on the trigger rather than move it to the frame. Instructors will often use the term “finger” to remind you to be aware of where your finger is located and move it if necessary. You do not want your finger on the trigger while you are inserting a new magazine or when holstering your firearm. So finger discipline is important both before the shot AND after the shot.

So when you head to the range, remind yourself of this important safety rule and be very conscious of your trigger finger, keeping it away from the trigger until you are ready to shoot. With some practice, your finger will always be in the right place! Safety is your number one priority!

]]>
https://consumerlawyernetwork.com/blogs/fundamentals/aiming-a-handgun 2018-04-12T20:43:00-07:00 2021-06-17T08:50:10-07:00 Aiming a Handgun Athena Means When it comes to learning how to aim your handgun at your intended target, you will hear the terms sight alignment and sight picture. But what are they exactly? Read more to find out!

More

]]>
When it comes to learning how to aim your handgun at your intended target, you will hear the terms sight alignment and sight picture. But what are they exactly?

Sight Alignment

Sight alignment sounds a lot like something a mechanic should be doing to your sights, like a front end alignment or something. But it isn’t. It refers to aligning the two sights on your handgun in such a way that you will hit your intended target. Your handgun most likely has a rear sight, which is the sight on the slide closest to you. Though there are many types of sights, the most common rear sight is a U shape. The other sight is the front sight, which is the sight on the end of the slide closest to the target. To get a good sight alignment, look through the opening in the rear sight and line up the front sight in the space of the U. Successful sight alignment happens when the front sight is level across the top with the rear sights and there’s equal space on either side of the front sight post. This is much easier to see than it is to explain in words. Correct sight alignment looks like this:


So, sight alignment refers to the relationship or alignment of the two sights on the slide of your handgun.

Sight Picture

Now that you have aligned the sights with one another, the next thing you want to do is get a good sight picture. While keeping the sight alignment intact, put the front sight post so that it appears to be either covering the intended shot placement on the target (combat hold) OR just below the intended shot placement (target hold). The correct sight picture will be dependent on your firearm.

Focus

So we have seen that there are three elements to aiming: the rear sight, the front sight and the target. The human eye cannot keep all three elements in focus. It is logical to believe that you should focus on the target because that is where you are aiming, right? Well, not exactly. Most experts agree that the best place to focus is on the front sight because the front sight in relation to the back sight is where the bullet is going. So the front sight post should be crystal clear while the rear sight is a bit blurry and the target in the distance is a bit blurry.

Putting it all Together

So now that you have the front sight aligned with the rear sight (sight alignment), you place that alignment so that the front sight, while aligned correctly, represents where you want the shot to be on the target (sight picture). Then you focus on the front sight while activating the trigger and taking the shot. Sounds simple, right? Like anything else with shooting, all it takes is practice.

]]>
https://consumerlawyernetwork.com/blogs/fundamentals/get-a-grip 2017-08-12T15:56:00-07:00 2021-06-12T19:39:22-07:00 Get A Grip! Athena Means A good grip helps you shoot accurately, while a poor one can prevent accuracy even if you are doing everything else right.

More

]]>

A good firing grip is important for several reasons.

First and foremost, a good grip means that you are holding the gun in the safest possible manner. It’s important to put your hands in the right places on the handgun so that you are not damaged by the slide activity of a semi-automatic, or by the hot gases coming out of the cylinder area of a revolver. It’s also important to hold the gun firmly so that it does not twist in your hand, causing unexpected strain to your hands or wrists.

A good grip helps you shoot accurately, while a poor one can prevent accuracy even if you are doing everything else right.

If you are firing a semi-automatic handgun, a good, solid grip allows the firearm to function at its best. Because semi-automatic parts move while firing, the pistol’s best reliability depends upon having a solid, nearly immobile platform for it to work from. You provide that platform with your solid grip and stance.

The exact definition of “good grip” will vary according to the shooting discipline you participate in. A good self-defense grip is extremely strong and very secure, so that if an attacker is very close he will be unable to wrest the handgun away from you while you are firing. This grip must allow you to shoot quickly and to rapidly re-align your sights after shooting.  It must enable you to fire at moving targets, possibly while you are also moving. And it must be flexible enough to allow you to do all of these things without stopping or readjusting your hands in any way in between shots.

In contrast to this, a good target shooting grip needs only to hold the firearm securely enough for safety and reliable function, so that the shooter may shoot as accurately as possible. Neither intensive speed nor extreme security are needed for target shooting. In fact, a too-firm grip is one thing that can prevent really precise accuracy. While target shooting, you’ll have enough time to readjust your grip and your stance between shots, although you may not want to do this since consistent accuracy really requires doing the same thing the same way every time.

The photos below illustrate some do’s and don’t's of grips appropriate to self defense shooting. If you are interested only in target shooting, especially in any of the high-accuracy, high-concentration distant target shooting sports, you will be better served looking elsewhere for information about how to hold the firearm.

A good, solid grip with thumbs locked down

The photo shows one good, solid grip. Note that both wrists are straight rather than bent, allowing the gun’s recoil to be absorbed by the bones rather than by muscles or tendons. The thumbs are locked downward, one over the other, which is the natural way a human hand makes a fist to hold stuff most securely. The shooter uses the crease of her finger, rather than the pad, to pull the trigger, because doing so gives her finger an additional measure of strength so that it will be able to fire quickly and repeatedly if needed.

Both hands provide equal tension in holding the firearm securely, and the muscles are quite tense rather than relaxed while firing. This mimics the muscle tension one may expect to experience when using the gun for self defense during a stress-filled encounter. 1

A thumbs locked down grip on a revolver

The grip in the photo is the same as the one in the first photo, but this time the shooter is holding a revolver. The fingers of her left hand are all touching each other, and her left index finger is jammed right up underneath the trigger guard. She is using the “power crease” of her trigger finger to fire the gun, an especially important point while firing rapidly in double action. Her wrists are straight, so that the energy from the fired shot will be cushioned by her arm bones and will not wrench her wrists.

A good, solid grip with thumbs forward

In the photo, the shooter is resting one thumb on top of the pistol’s thumb safety. This is beneficial for several reasons. Doing so enables her to flick the safety off very quickly as she raises the gun to fire. It also guarantees that the safety cannot be bumped on unintentionally while she is firing.

Note that the shooter’s wrists are still straight, and that her hands are still clenched firmly enough that she has a very solid grip on the gun. Although the thumbs-forward grip does not allow quite as much security as a thumbs-locked-down grip, it is nearly as secure and can be very beneficial to the shooter whose firearm is equipped with a thumb safety.

A not-so-secure way to hold the gun, the teacup grip is not recommended

This is an example of an insecure hold, the teacup grip (sometimes called the cup-and-saucer grip). From a defense shooter’s perspective, the chief problem with this hold is that the non-dominant hand provides no assistance in recoil control for rapid shots, and little assistance in retaining the gun if necessary.

The sole advantage of the teacup grip is that the non-dominant hand does give additional support to the lifting muscles in the dominant arm. This means that if you ever need to hold someone at gunpoint for an extended period of time, you may want to bring your arms closer to your body, relax your elbows slightly, and allow your hands to fall into the teacup grip. Just remember it isn’t best for shooting or for hanging onto the gun if you are in a fight for your life.

What’s that finger doing up there?

Above is another grip I don’t recommend. Placing the non-shooting trigger finger forward accomplishes nothing at all: neither recoil control, nor strength, nor accuracy are improved by it. In fact, putting that finger forward lessens the gripping strength of your non-shooting hand, which in turn weakens your entire grip.


A wrist brace?

Sometimes you will see an old-time revolver shooter using the wrist-brace grip. It really isn’t necessary to reinforce the wrist in this fashion, and doing so prevents your non-shooting hand from doing other good stuff like helping to hold the gun securely. 2

More important: getting into the habit of holding a firearm in this way can be very dangerous. If you try it with a semi-automatic, either deliberately or out of thoughtless habit, you’ll painfully discover why it’s such a bad idea (see next entry.)

Do not allow the thumb to rest behind the slide!

It is important never to allow your thumb to rest behind the slide of a semi-automatic. When a shot is fired, the slide moves very quickly toward the rear, and then is driven forward again by a powerful spring. If your thumb is in the way of this movement, injury is very likely.

After you become more proficient with the gun, you might try to fire with your non-dominant hand sometimes. If you do so, please remember that your dominant hand thumb is likely to slip behind the slide out of habit when you are not paying attention. Don’t let this happen — it hurts!

 Footnotes:
  1. This is very different from a target shooter’s grip even though it may look similar to a casual observer. Most target shooters will relax the shooting hand almost entirely, allowing the non-shooting hand to do most of the work of holding the gun. Their muscles will be relaxed rather than tense while firing; this allows greater precision, but sacrifices security.
  2. If your wrists hurt while shooting, there’s a good chance that you are not holding them straight but are instead crooking them while firing. The solution isn’t to put your other hand up to hold your crooked wrist still. Instead, learn to learn to fire with your wrist straight.

~~~~

By Kathy Jackson, Cornered Cat. Shared with permission.   Kathy's book, "Cornered Cat: A Woman's Guide to Concealed Carry" is a must-read!

]]>
https://consumerlawyernetwork.com/blogs/fundamentals/shooting-stance 2017-08-12T15:54:00-07:00 2021-06-12T19:39:24-07:00 Shooting Stance Athena Means

“Stance” is the word shooters use to refer to body position while shooting. There are literally dozens of minor variations for each of the common handgun shooting stances. This is because every body on the planet is different from every other body. What works well for you may not work quite as well for the person standing next to you. 

More

]]>

“Stance” is the word shooters use to refer to body position while shooting.

There are literally dozens of minor variations for each of the common handgun shooting stances. This is because every body on the planet is different from every other body. What works well for you may not work quite as well for the person standing next to you. If a particular stance works well for someone whose basic body shape and proportions are similar to yours, it’s possible that the same basic stance will work well for you, too. But because your body is not identical to theirs, you will probably still have to tweak the stance a little to make ityour stance.

Some shooters choose to make stance something like a religion: you must use a particular stance, or you’re not really a shooter. Please do your best not to listen to the dogmatists. Each stance has its own strengths and weaknesses. After you have tried them all, you will probably realize that one stance works best for you. That’s good, but you also need to be reasonably familiar with them all, and able to get good hits from all of them.

If you ever need to use this stuff for keeps, the chances are that you will not use any particular foot position — you’ll be running, or crouched behind something, or ducking. That doesn’t mean you “aren’t using a stance.” Every time you shoot the gun, your body is in some kind of stance. Remember, stance just means your body position while shooting. Even without considering what your feet are doing, you still hold the gun in a particular way (probably the way you have practiced most often). Your arms are either straight or bent. Your grip is either firm or loose. Your upper body is either squared to the target or it’s not. All of these things together make up a stance.

The three basic defensive handgun stances are Weaver, Chapman, and Isosceles. Weaver and Chapman are named after the men who first popularized them, while Isosceles is named after the triangular shape made by the shooter’s arms and body. All three stances have been used both in competition and on the street, and as I said above, each has its own strengths and weaknesses.

Weaver

Jack Weaver was a Deputy Sheriff in the 1950′s when he began standing this way in competition. A young Jeff Cooper quickly adopted Weaver’s stance, and later popularized it at his shooting school, Gunsite. The Weaver stance was a truly radical departure from the way things were done at the time. Until Jack Weaver came along, most handgunners held the gun with one hand, and fired quickly from the hip, or from the shoulder while sighting down the extended arm. Few held the gun with both hands, and few used the sights.

Weaver Stance
The Weaver stance can either be tucked in close ...
The Weaver stance can either be tucked in close …
 
... or thrust out quite a ways.
… or thrust out quite a ways.

In either case, its chief defining characteristic is the push-pull tension produced by pushing out with the strong hand while pulling in with the weak hand.

In the Weaver stance, the body is bladed partly sideways in relation to the target rather than squared towards it. The elbows are flexed and pointed downward. The strong-side arm is slightly straighter than the weak-side arm. The shooter pushes out with the gun hand, while the weak hand pulls back. This produces a push-pull tension which is the chief defining characteristic of the Weaver stance.

Good: seen from above, a good Weaver tucks the elbows in.

Good:  Seen from above, a good Weaver looks like this, with the elbows in.

Bad. The elbows should be tucked close to the body, not sticking out to the sides like this.

Bad:  The elbows should be tucked close to the body, not sticking out to the sides like this.

Weaver depends on muscles rather than skeletal support for recoil control. Because women tend to have less upper-body musculature than men do, Weaver tends to be slightly more popular with men than with women. While many women have no problem with it at all, Weaver can be difficult for some. Women who are very well-endowed may have difficulty achieving stability with this stance, because attaining good stability in Weaver really requires your elbows to point downwards rather than out to the sides.

To engage targets to one side or another in the Weaver stance, simply bend your elbows to bring the gun around. Weaver is the most flexible stance for working in tight quarters, and for engaging targets in multiple directions.

To engage targets to the side in Weaver, simply bend one elbow more sharply to bring the gun around.

To engage targets to the side in Weaver, simply bend one elbow more sharply to bring the gun around.

In Weaver stance, cross-dominance may become an issue to keep in mind. Shooters who are right-handed but left-eyed, or left-handed but right-eyed, may find that even when Weaver works well for them in slowfire, it tends to fall apart when speeded up or under stress. Because of the angle at which the gun must be held in Weaver, cross-dominant shooters may do better using another stance.

Bladed Weaver

Weaver works best when the body is bladed toward the target, rather than squared to it. This may be a problem for those wearing body armor, but for ordinary citizens it is unlikely to be an issue.

Police officers wearing body armor need to remember that blading sideways toward the target, which works so well in Weaver, may also open up the side of the body armor to the target. If you often wear body armor in real life, you may want to practice a more squared-off version of Weaver instead of the traditionally bladed one.

Chapman (Modified Weaver)

The Chapman stance is named for Ray Chapman, another shooter who had a great influence on the styles handgunners use today. Chapman adopted Weaver’s push-pull stance, and then changed it just slightly.

Chapman uses the same push-pull tension which defines the Weaver, but instead of both elbows being bent, the gun side elbow is held straight and locked in place. Assuming a right-handed shooter, the right arm is punched straight out, while the left elbow is bent and the left hand pulls back to provide tension. As a result of this change, Chapman gets its stability from both muscle and skeletal support. This makes it a little more friendly than Weaver for those who lack upper-body muscle strength.

Chapman Stance
Chapman stance

Chapman stance: the strong-side arm is thrust straight out and locked in place, while the weak hand pulls back against it. This produces the same push-pull tension which defines the Weaver stance, but uses both skeletal and muscular support.

Chapman stance seen from the top

In Chapman as in Weaver, the elbow should be flexed downwards rather than pointed out to the side.

Because the ideal Chapman stance involves sighting directly down the shooter’s dominant arm, cross-dominance remains a minor issue in Chapman just as it is in Weaver.

Chapman 'riflestock,' a stance adaptation for cross dominant shooters

A left-eyed shooter may use her own right arm as a riflestock in the Chapman stance. This works well on the range, but sacrifices too much peripheral vision if you are practicing for self-defense.

Occasionally, you will find a left-eyed person who shoots right-handed Chapman by resting her head on her bicep and using her right arm as if it were a rifle stock (see photo). This works well enough when target shooting on the range, but is a bad idea for defense work because it cuts your field of view into a very narrow area. Given that tunnel vision is likely to be a problem anyway, narrowing your visual field in this way is a bad idea because it may prevent you from seeing the attacker’s friends or the arriving police.

Isosceles

While the Isosceles stance had been around for several years, it did not really become popular until some young upstarts named Brian Enos and Rob Leatham started using it to win IPSC competitions in the early 1980′s.

Isosceles Stance
Isosceles stance seen from the top

In Isosceles, the arms are straight and the gun is positioned directly in front of the shooter. This produces the triangular shape which gives the stance its name.

There are two basic variants of the Isosceles stance. In Traditional Isosceles, the feet are parallel and pointed toward the target, the knees are straight or only slightly flexed, and the entire body is upright. This is an acceptable range stance provided recoil control is not an issue and you don’t need to make rapid follow-up shots. However, if you are practicing for self-defense, you will probably want to use the Modern Isosceles stance instead.

Traditional Isosceles stance

The Traditional Isosceles stance is often seen on the range. It works well there, but does not provide the flexibility and speed of movement required by self-defense shooters.

In Modern Isosceles, the feet are roughly shoulder width apart, with the gun-side foot closer to the target than the off-side foot. The knees are flexed, and the entire body leans slightly toward the target. The shoulders are closer to the target than the hips, and the hips are more forward than the knees. The shoulders are rotated forward and the head, rather than being upright, is vultured down behind the sights. The entire body thus has an aggressively forward appearance, and is poised to move quickly if necessary.

Modern Isosceles

The Modern Isosceles stance is aggressive-looking, and provides a stable platform which allows the shooter to move in a hurry if needed. In Modern Isosceles, the shoulders are forward of the hips, and the hips are forward of the knee and lower legs. Both knees are flexed slightly.

In Weaver, if you need to engage targets to one side or the other, it is accomplished by bending your arms to bring the gun around. In Isosceles, think of the entire upper body as the gun turret on a tank. When you need to engage a target to the left or right of the original one, you will pivot your entire upper body smoothly to present to the new target.

The Isosceles turret

To engage targets to the side in Modern Isosceles, think of the entire upper body as the turret on a tank, which swivels as needed to aim at the threat.

In either variant of Isosceles, the skeletal system provides most of your recoil control. Rather than actively controlling the recoil using muscle strength as in Weaver or Chapman, Isosceles shooters passively control recoil by absorbing it with their entire bodies.

Isosceles stance works well for those with eye dominance issues because the gun is easily aligned with either eye from the center position.

Perhaps the biggest weakness of the Isosceles stance is that it tends to bounce the gun as the shooter is moving. Relaxing the arms slightly, so the elbows are not locked out, reduces the jarring but lessens the skeletal support necessary for recoil control in this stance. Perhaps the ideal solution to this difficulty is learning to move smoothly, and also learning how to easily transition between Isosceles, Chapman, and Weaver stances depending upon the type of shooting being done.

Faux Isosceles

I just made up this phrase and you won’t find it anywhere else that I know of. But …

Some women will just bend over backwards in order to shoot. I think the reason so many do this is because a woman’s center of gravity is a lot lower than that of an equal-statured man. Where most men can hold a heavy gun out in front of them without strain, some women have difficulty doing so for long. There’s some counter-balancing going on, too. Since women have proportionately less upper body strength than men do, and because there are those curves hanging out in front, bending far backwards causes the lifting muscles to do a little less work. Finally, many new shooters are somewhat afraid of the gun, and so you see them doing this to get their faces further away from it.

 Faux Isosceles
Faux Isosceles

Some women will just bend over backwards in order to shoot. Please don’t do this …

There are two problems with this bent-over-backwards stance.

First, it just looks goofy. If you want to be taken seriously as a competent shooter, it’s good to look the part. Looking as if you’re afraid of the gun does not help much in the “take me seriously” department.

Second, and more important, it’s not stable. It might be good enough for slow, controlled target shooting, when you’re shooting light loads and the speed of follow-up shots really doesn’t matter. But if you’re practicing for self-defense, it’s best to get a more solid foundation underneath you, and to position your body so you’re not so far off balance.

Other Stances

While Weaver, Chapman, and Isosceles are the dominant triumvirate of defensive handgun stances, they are not the only stances by any stretch of the imagination. There are many, many other handgun stances familiar to shooters worldwide.

Shooting from the hip

Shooting from the hip is sometimes called the “Speed Rock” or “Shooting from Retention.”  It’s very fast for close encounters, but doesn’t have a great track record for accuracy at distances greater than a few yards.

Bullseye stance

Here’s a one-handed stance which may be familiar to Bullseye and target shooters.Until Jack Weaver started using two hands in the Leatherslap competitions in the southern US during the 1950′s, most handgun shooters used this stance or shot from the hip as in the picture above.

One handed shooting stance

Most modern defensive shooters use this stance when they must shoot one-handed. The weak hand is brought up close to the body, underneath the pectoral muscles, and the weak hand is clenched into a fist. Because of the body’s sympathetic nervous system, clenching the weak hand provides an increased measure of strength to the strong hand.

~~~~ 
by Kathy Jackson, Cornered Cat. Shared with permission.  Kathy's book, "Cornered Cat: A Woman's Guide to Concealed Carry" is a must read!
]]>
https://consumerlawyernetwork.com/blogs/fundamentals/managing-eye-dominance 2017-08-12T15:49:00-07:00 2021-06-12T19:39:26-07:00 Managing Eye Dominance Athena Means

Which Is Your Dominant Eye?

Just as you have a dominant hand, you also have a dominant eye. You need to aim with the dominant—or master—eye for the most accurate shooting. Usually your dominant eye is the same as your dominant hand, but not always.

More

]]>

Which Is Your Dominant Eye?

Just as you have a dominant hand, you also have a dominant eye. You need to aim with the dominant—or master—eye for the most accurate shooting. Usually your dominant eye is the same as your dominant hand, but not always.

To determine your dominant eye:

  1. Form a triangular opening with your thumbs and forefingers.
  2. Stretch your arms out in front of you.
  3. Focus on a distant object while looking through the triangular opening and keeping both eyes open.
  4. Bring your hands slowly to your face, keeping sight of the object through the opening; the opening will come to your dominant eye naturally.

If you’re not sure, close one eye at a time. The weak eye will see the back of your hand; the strong one will be focused on the object in the triangle.


Fixing Cross Dominance

There are various ways to address cross dominance (ie. you are right handed, but your left eye is dominant or vice versa). 

Use a patch on your glasses - when applied to the lens of the shooting glasses over the offending eye, this subtly prevents the eye from focusing, while maintaining depth perception and peripheral vision. See magic eye dots.

For rifles/shotguns:

1. Use red dot sights. This allows one eye t acquire the target and the other acquire the red dot. The shooter’s brain superimposes the two, enabling precise aim. With cross-eye dominant shooters, the stronger eye looks at the target and the weaker eye picks up the red dot, leading to a sight picture as good as or superior to that of regular shooters.

2. Learn to shoot with your non-dominant hand, mounting the firearm on the same shoulder as your dominant eye. This will take some time.

For handguns:


]]>
https://consumerlawyernetwork.com/blogs/fundamentals/racking-the-slide 2017-08-12T15:45:00-07:00 2021-06-12T19:39:29-07:00 Racking the Slide Athena Means Racking the slide is not about strength. It is all about technique.

More

]]>

“My wife can’t always rack the slide, so even though she wants a semi-auto, I am going to insist she gets a revolver.”

“I like my revolver okay, but I’d sure like to try a semi-auto. Problem is, I can’t pull the slide back.”

“I can almost pull the slide back, but not far enough to lock it open.”

“I’m not strong enough to do the slide …”

If I had a nickel for every time I have heard variations on that theme, I’d be a wealthy woman today. Despite this, it is my contention that healthy adult women who really-and-truly cannot be taught to rack a slide are very, very, very rare. I’m almost tempted to say there are none at all.

A lot of men who have shot for years have never learned how to rack a slide without using a lot of muscle. They have not learned the easiest techniques, because they haven’t needed to. As a result, when these men become informal instructors for their female loved ones, they don’t know what to do if a woman can’t just muscle the slide back in the same inefficient way many men do. Soon these men become convinced that “Women just can’t …” And their female loved ones buy the lie, thinking of themselves as too weak to run a modern firearm.

Racking the slide is not about strength. It is all about technique.

It is true that a lot of women cannot rack a slide simply by muscling it through. There’s no shame in this! A woman’s strength is usually centered in her lower body and particularly in her legs, rather than in her upper torso and arms. But there are techniques which work with a woman’s strengths, rather than against them.

Probably the biggest hurdle you will have to overcome, since you are reading this article, is the belief that you’re not strong enough to rack the slide and that racking the slide is a matter of brute force. It is not. Technique matters far more than muscle. If you have difficulty, don’t give up. You can learn this — honest, you can.

Another misapprehension I sometimes see is that some people are reluctant to be aggressive in handling the firearm. They want to baby it, trying to move the slide slowly or gingerly. Please believe me on this one: there is very little you can do with your hands to damage this piece of modern metal. The gun is designed to cope with extremely high pressures from the inside, and the slide is designed to travel far faster than you will ever be able to move it. The springs inside it are built to cope with far more energy than you’ll ever produce with your hands. You cannot hurt the firearm by moving quickly.

Finally, some women are afraid the slide will bite them or otherwise hurt their hands. A gruff instructor might just growl, “Get over it,” but maybe that’s a little harsh. If you are afraid of the slide and its movement, I suggest you ask a knowledgeable someone to show you the internal parts of your semi-automatic and educate you about exactly what each part is doing and why it is doing it. Then pay special attention to the photos below so that you learn where you can safely place your hands during the process. With your hands placed correctly, you are less likely to get pinched or poked if you move quickly rather than slowly. Finally, if there are any sharp or pointy edges on your firearm, consider asking a gunsmith to gently soften the offending corners.

A Note About Safety

Keep Your Finger Off the Trigger!

No matter how much you may struggle with the slide, do not put your finger on the trigger.

Let us start by discussing safety. The very first rule in learning to rack the slide is that all other firearms safety rules still apply.

Human hands have a sympathetic grip reflex. When one hand clenches, the other hand often closes along with it. When part of the hand closes tightly, the rest of the hand wants to close just as tightly. This can be a problem because your trigger finger will be affected by this reflex. As you grasp the slide, your trigger finger will want to join the other fingers of your grip hand as they tighten, and will often curl right into the trigger guard and onto the trigger. Especially if racking the slide is difficult for you, you must consciously prevent your finger from curling onto the trigger while you work the slide.

The other common safety bugaboo for those who are first learning to rack the slide is that it can be difficult to remain aware of muzzle direction while your mind and hands are learning this new skill. But for safety’s sake, you must always be conscious of the direction the gun is pointed, just as you must every other time you handle a firearm. Even though it may be difficult, it is very important that you never point the firearm at anything you are not willing to shoot.

Occasionally, you will encounter people who cluelessly or deliberately point the firearm at their own abdomens or at their weak-side forearms and elbows while they are racking the slide. Please do not emulate these people. The risk simply is not worth it.

Positioning Your Hands

The first step is to get a good grip on the butt of the gun with your firing hand. This grip should not be too different from your normal shooting grip, except that your trigger finger stays far outside the trigger guard. If you index it along the frame, make sure it is high on the frame so that the sympathetic grip reflex doesn’t trip you up.

With your dominant hand on the grip of the gun, your non-dominant hand is free to grab the slide. You can grab the slide in one of two basic ways, both shown below.

Good Slide Grasping Techniques

Slingshot technique

Slingshot

Shown with gun rotated port-up, but better done with gun port-down.

Overhand technique

Overhand

Probably the strongest technique for most people.

The option on the left, called the slingshot grasp, is generally a little more difficult for most people but works well for others. Option two is the overhand grasp, which is generally easier for most people. Since every human hand is different, you will need to try both and figure out which one works best for you.

Poor Slide Grasping Techniques

Weak pinch. Not recommended!

Weak Pinch

Not recommended.

Covered Port. Unsafe.

Covered ejection port

Unsafe.

The picture on the left shows a weak pinch. This simple pinch is not a good idea because it is just not strong enough for most people. You will generally need to get a little bit more hand on the slide for strength, as shown in the picture titled “Slingshot” in the upper photos.

The photo on the right shows an overhand grasp that is badly placed. The ideal overhand grasp goes just behind the ejection port, which is the part of the gun from which the empty shell casings come out. You should never cover the ejection port while there is still a round in the chamber. One reason is because covering the port can prevent the chamber from being emptied when you rack the slide, and may even cause a jam. But the more important reason not to cover the ejection port is that doing so can be somewhat dangerous. If the primer is punched while you are struggling with the slide — rare but not impossible if your firearm has a protrusive extractor or ejector — the shell casing is likely to split and the full force of the round may detonate in the palm of your hand. This could be rather messy and uncomfortable.

So grasp the grip firmly with your shooting hand, and grasp the slide firmly with your non-shooting hand. Do not cover the ejection port.

Racking the Slide

Now that you have positioned your hands, you need to find a position for your arms and body that will maximize your strength and allow you to move the slide efficiently. Human beings tend to be strongest at the midline, with hands fairly close to the body. When you extend your arms straight out, you lose some of that essential strength. Similarly, you don’t want the gun too far to one side or the other. Just bring it back to your center, somewhere around or perhaps just above your belly button. Keep the gun pointed downrange at all times; do not allow it to point at other shooters on the line.

Bring gun to midline

Bring gun to midline

Keep the gun pointed downrange, not at other shooters on the line.

From this point, you have two choices.

Method One is simply to drive your gun hand sharply forward while holding the slide firmly in place so that it does not move with the gun. When I say to drive the gun forward sharply, that is exactly what I mean: you want a quick, explosive movement of the grip hand, punching it out and away from your body. The movement is sudden, fast, explosive. You may pull back slightly on the slide while this is happening, but “pulling the slide back” is not the goal. The goal is to punch the gun forward while the slide stays still.

Do not think of it as pulling the slide back, but as punching the gun forward.

Method one: punch the gun forward

Method One: punch gun sharply forward, holding the slide still while the gun is in motion.

Method Two is harder to describe with the written word than it is to perform on the range. In this method, you anchor your dominant elbow to your dominant hip, and then quickly rotate your entire hip and lower body to punch the gun forward while holding the slide in place with your non-dominant hand. This one works really well because it recruits your strongest muscles, those in your legs and lower body, to do the work of moving the slide for you.

Method Two. Use hip to drive gun forward.

Method Two: Anchor Elbow. Use hip to drive gun forward under the motionless slide.

You must punch the gun forward fast and hard, so that the slide quickly hits its rearmost point. But this is not all there is to racking the slide.

Once the slide has gone all the way to the rear, you will need to let go of the slide so that it can travel forward on its own. The slide needs to travel forward again under its own spring tension in order to load the gun properly.

Note: if you are not loading the firearm, but instead want the slide to close on an empty chamber, you can and should lower the slide gently by hand. But to “rack the slide” when loading, you must allow the slide to close itself without softening its fall in any way.

Some people have a hard time letting go of the slide after getting it back. They let their slide hand travel forward with the slide. This is called “riding the slide” and it is a bad habit. In order to avoid this bad habit, create the good habit of simply opening your hand when you feel the slide hit its rearmost point. If necessary, slap yourself on the shoulder with your slide hand as the gun hand continues to travel forward. This will keep your slide hand from reflexively traveling forward with it.

Once you have figured out how to rack the slide quickly and decisively, practice the motion a few times (don’t wear yourself out!) before you move on to the next step.

Locking the Slide Open

At this point, you may be saying, “Wait a minute. I can move the slide okay. I just can’t get it to lock back!” Have no fear — there’s a secret, easier method to doing that, too.

To lock the slide to the rear, you will be doing the same series of motions that you did above. However, before you punch the gun forward, you are going to shift your grip hand around just far enough that you can lift of up on the slide stop lever during the entire time that the gun is in motion.

Push up on the slide stop lever

Locking the Slide

Push up on slide stop lever the entire time the gun is in motion.

The reason you are lifting up on the slide stop lever the entire time is that it takes a lot of strength to hold the slide to the rear while you fumble around looking for that annoying little lever. So you instead will explosively punch the gun forward with the lever prepped to slip into place when the slide gets to the right point.

You should be aware that semi-automatic slides can be retracted up to an inch further back behind the slide lock point. You are not pulling the slide back to its rearmost point, but only most of the way there. That is another reason to put upward pressure on the lever while racking the slide — you won’t have to struggle to hold the slide back while moving it back and forth looking for the magic spot. With upward pressure on it, the stop lever will simply slip up and into place, locking the slide into place the first time the slide nears the lock point.

If you absolutely cannot find a hand position which allows you to reach the slide stop lever while punching the gun forward, it may be time to consider personalizing your gun by installing slimmer grips, getting a grip reduction, or even purchasing a different gun whose grip size is more suited for your hand.

For Lefties Only

Left-handers have some special challenges when it comes to running guns which are designed for right-handed people. This is nothing new for us lefties, since by the time any lefty reaches adulthood, we’ve all had years of practice at overcoming such challenges. Although it can be discouraging at first, remember that this problem is not impossible. It’s just one more adaptation to a right-handed world.

If your firearm is not truly ambidextrous, but you are running the gun left-handed, here is what you will need to do in order to lock the slide back. Maintaining your firing grip upon the gun with your left hand, and with your trigger finger far outside the trigger guard, place your right hand over the top of the slide with your right thumb along the left side. Grab the slide firmly, using the muscle at the base of your thumb to grip the slide on the thumb side.

This grip should enable you to reach the slide lock lever with your right thumb.

To retract the slide, just like the right-handers you will drive the gun quickly forward with your left hand while holding your right hand immobile or pulling it back just slightly, or you will anchor your left elbow to your left hip and drive the gun forward with your left hip while holding the slide immobile with your right hand. Practice this motion a few times before you try to lock the slide.

To lock the slide, use your right thumb to pull up slightly on the slide stop lever.

Lefties: use right thumb to pull up on slide stop lever

Lefties: use right thumb to pull up on slide stop lever.

If you cannot pull up on the slide stop lever with your right thumb without covering the ejection port, that is okay as long as you have checked that there is no round in the chamber. First drop the magazine and rack the slide several times, making sure there is no round in the chamber. When there is no magazine in the gun, and no round in the chamber, it is not unsafe to cover the ejection port while you lock the slide. Be careful not to get the meat of your hand pinched within the port if you need to lower the slide from this grip.

 You can do this …

Although working the slide can be a challenge for many novice shooters, with a little determination and willingness to experiment the challenge can be mastered. If after reading the instructions above you still have difficulty, find yourself a competent female instructor and ask her to show you how she does it. Do not get discouraged, and do not give up. You CAN do this!

~~~~

By Kathy Jackson of The Cornered Cat. Shared with permission. Kathy Jackson's book "The Cornered Cat: A Woman's Guide to Concealed Carry" is a must-read!

]]>